A guide for beginners on creating a website using WordPress CMS and ServerFreak cPanel Hosting.
Are you a small business owner or planning for starting up an online business? Well, this may be helpful for you as this article will guide you how to create your own website step by step with one of the world most popular CMS WordPress that powering more than 54.4% of website.
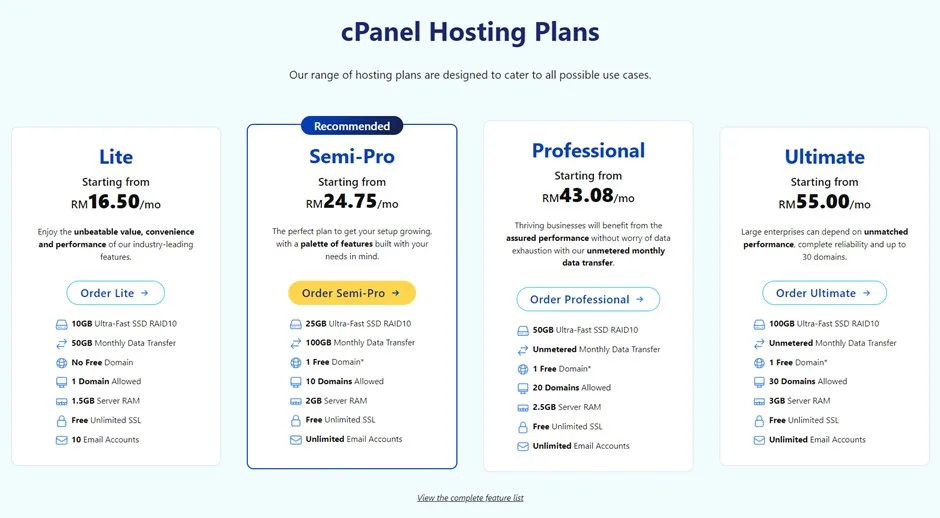
Before we get started with the WordPress setup, let’s get yourself a server. Serverfreak is one of the affordable yet reliable hosting provider with the litespeed hosting package as low as RM16.50/month. To get thing started, choose a package that suit your usage and a domain, if you are building a small site cPanel Lite Hosting might be a good choice for you.
Once you have your server setup, you may login into the cPanel and start configuring the server and setting up a WordPress CMS.
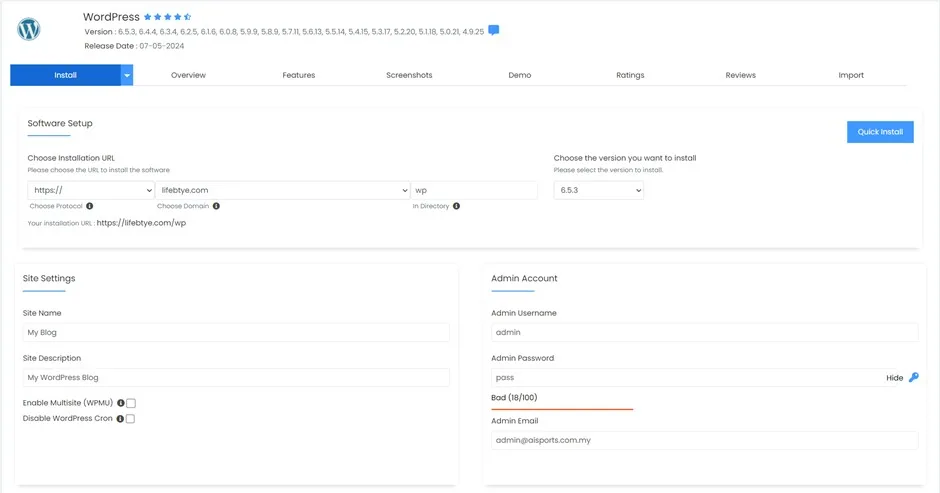
Upon logging into the cPanel, you are given the option to control the entire server and have all the resources at a glance. Navigate to the “Softaculous Apps Installer” to begin the WordPress Installation.
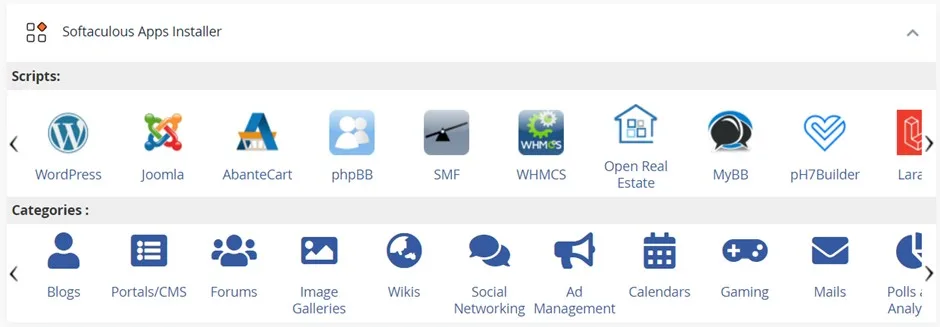
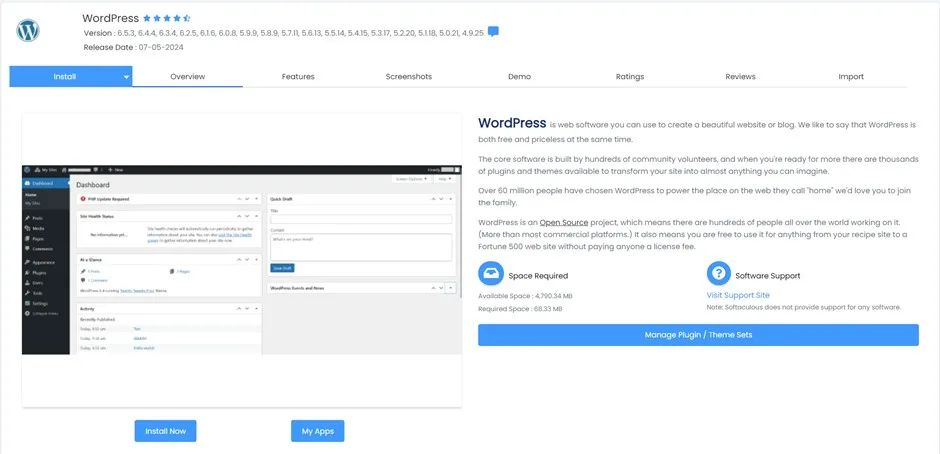
For your information, Softaculous apps installer is a handy tool that came with wide range of script library that automates the installation of web applications and we are using it to install the WordPress CMS. To begin, click on the “Install Now” button, select the domain and fill up the site setting, admin account information, choose the language and the rest remain as default to complete the installation.
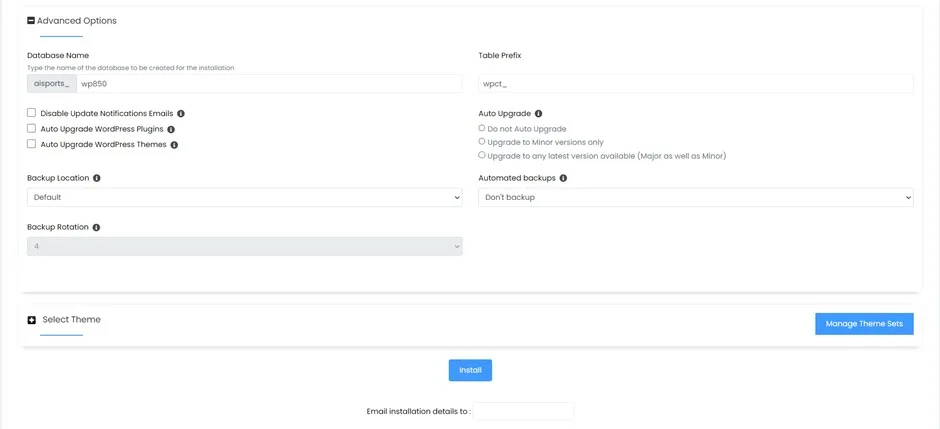
The installation will take around 1-3 minutes. Upon completion an administrator access link will be given, click on the link and you will be redirect to your first WordPress dashboard.
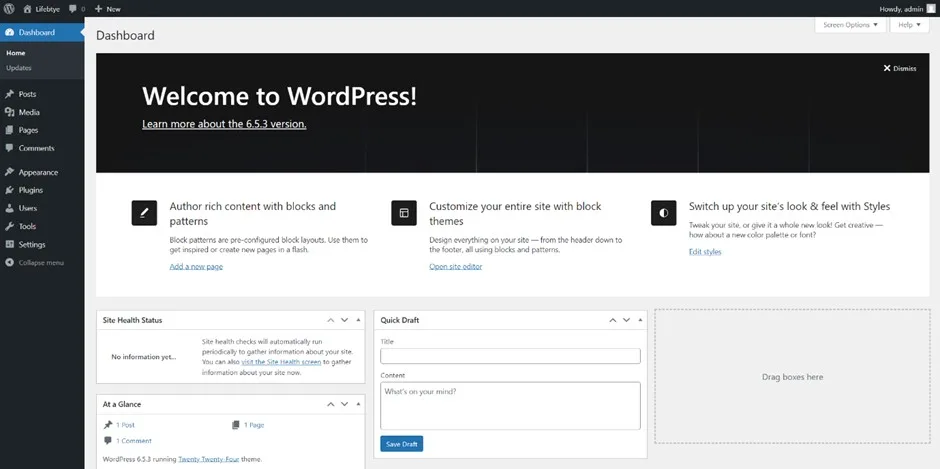
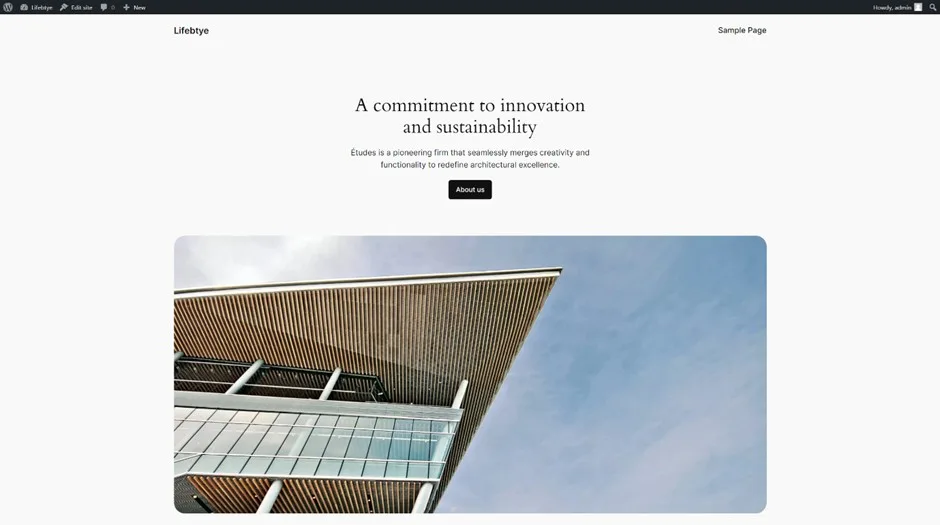
By now you have the server and WordPress setup, if everything setup correctly, you should be able to see your website displaying in the browser with the default theme activated.
At this point, let’s get familiar with the following matters before we dive into building a website with WordPress.
Change the default settings
It is important to change the default settings of the site as there are several potential issues may occur with the default setting such as getting spam on post comment and bad search engine optimization with the default permalink structure.
Permalinks: Choose a user-friendly structure like post name which might improve the SEO and make the site URLs more readable instead.
Site Title and Tagline: Ensure the title and tagline is align with your branding and site’s purposes.
Dicussion Settings: *Suggest to “Uncheck – Allow people to submit comments on new posts” and “Check – Comment must be manually approved” and “Check – Comment author must have a previously approved comment” to ensure your site is not getting spam with junk comment especially for site with product and posting.
Reading Settings: Be default the index page of the WordPress site is the latest post, but most of the case we want to have a homepage and this is where you can set a specific page to be the homepage.
Installing Theme
Theme control the visual appearance of your WordPress site which including the layouts, colors, typography and other design elements. Therefore, choosing a right theme according to your need is something you may need to consider.
Buying a ready-made theme: The fastest and the easiest way to build a website is buying a ready-made theme from platform like themeforest.net. It usually came with instruction on how to download, install and import the theme, once the theme is installed all you need to do is customize the content according to your need.
Pros: A well designed theme may facilitate a fast and efficient way to build a website within hours with minimal knowledge in web development.
Cons: Support and theme maintenance might be a major concern as a theme usually consist of several plugin. Therefore, theme and plugin compatibility will be an issue in long run.
Build on top of Base Theme: With the help of page builder and block editor such as Divi, Elementor, Gutenberg and WPBakery usually came with its own theme that work best and compatible to their own page builder plugin.
Pros: You’re given more flexibility to build the site according to your need and have better compatibility with the plugin.
Cons: Lack of built-in features as it came with barebone design, also it has learning curve to make the most out of the page builder which require basic knowledge on web development.
Install Essential Plugins
One of the reasons why WordPress is one of the most popular CMS because of its customizable feature which anything can be added through plugin in this article we will focus on 4 essential plugin which make your site more secure and SEO friendly.
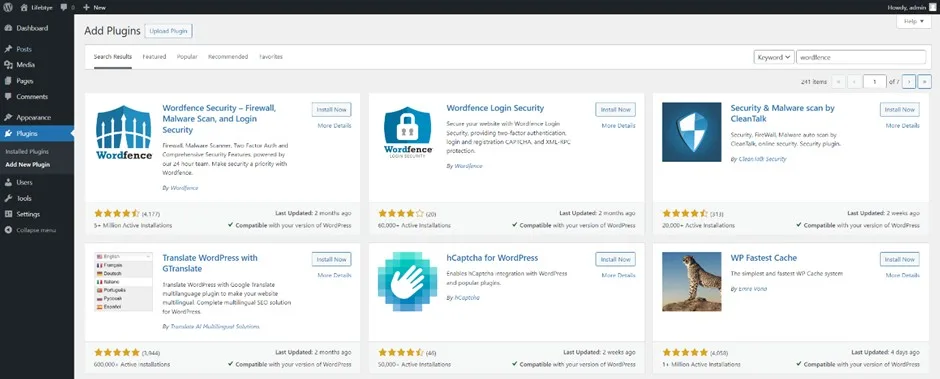
Wordfence Security: WordFence is a comprehensive security plugin built to protect your WordPress site against hacking attempts, malware and other security threat. Among the feature offer by WordFence plugin is firewall protection, malware scanning login security and real-time monitoring.
Rank Math: Rank Math is a Search Engine Optimization (SEO) plugin to help you optimize your WordPress content for search engines. It provides a comprehensive set of tools for on-page SEO include keyword optimization, meta tags, and snippets.
LiteSpeed Cache: Website loading speed and response time is crucial for SEO and a pleasant user experience and according to google best practice it good to keep the site loaded within 3 seconds. So, with the help of LiteSpeed Cache it can improve the site load time significantly by caching the static content and optimizing dynamic content. For this case, LiteSpeed Cache is the most optimum cache plugin to be integrated as ServerFreak cPanel hosting is powered by LiteSpeed Web Server.
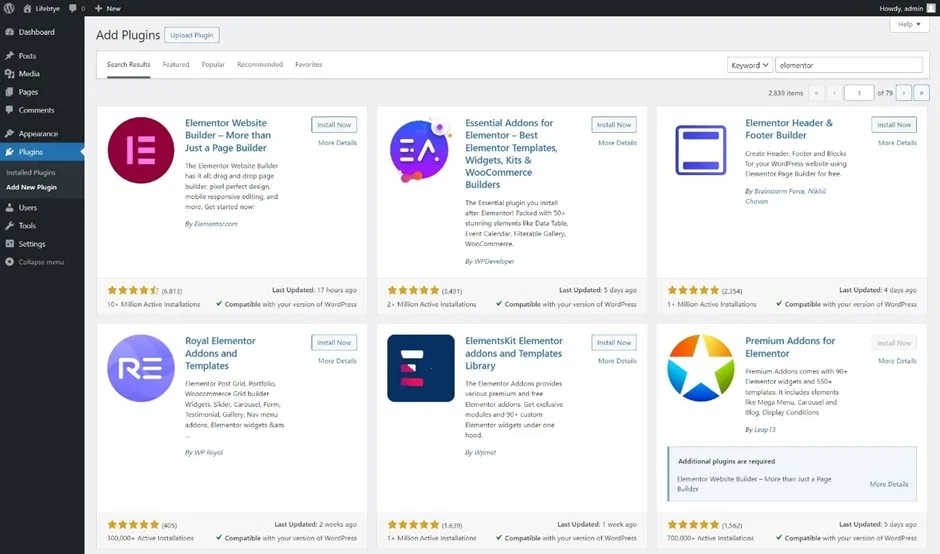
Elementor: Elementor page builder with pre-made customizable widget and real-time drag n drop editing might be optional to you if you have basic knowledge in HTML and CSS or the Gutenberg block editor came with WordPress is enough for you.
With the introduction and site setting configuration above, you should be ready to start building a website with WordPress CMS and we will build a landing page with Elementor Page builder.
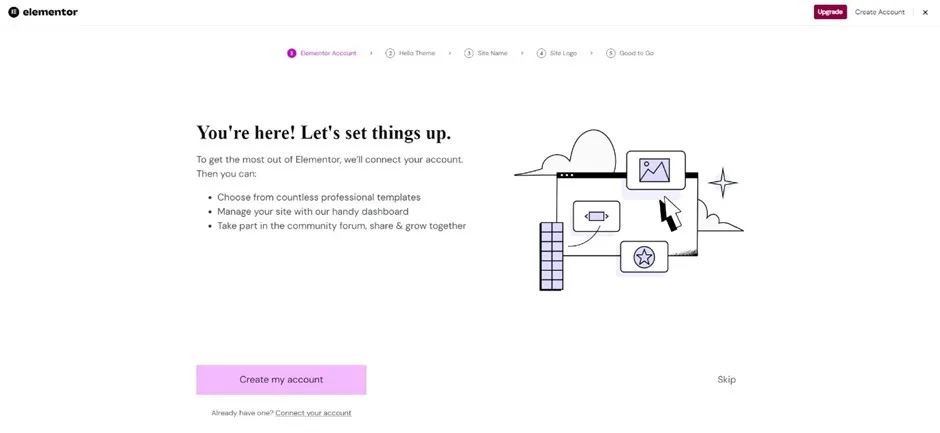
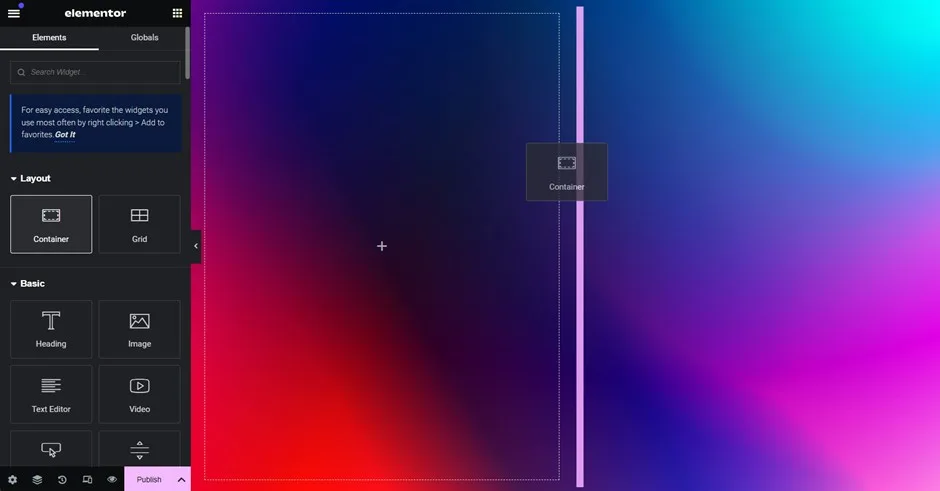
To begin, install the Elementor plugin from Plugins -> Add New Plugin and search for “Elementor”, click install and activate the plugin, you should be redirect to the Elementor installation wizard which allow you to configure the basic setting such as installing “Hello Elementor” theme, setting site name and site logo.
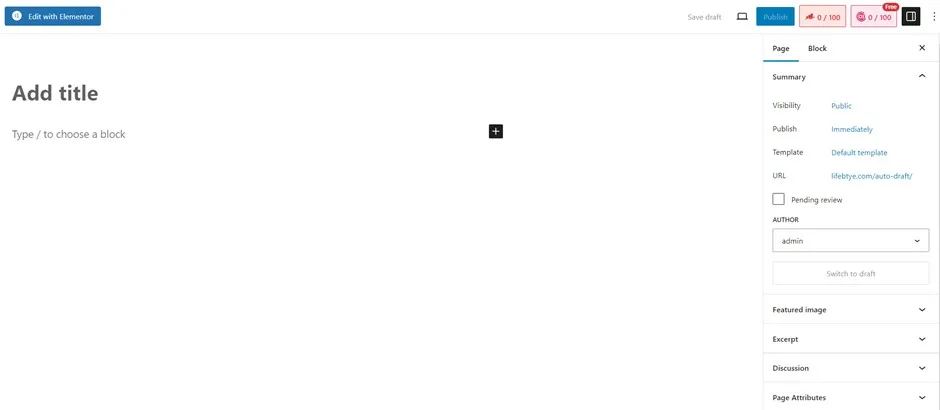
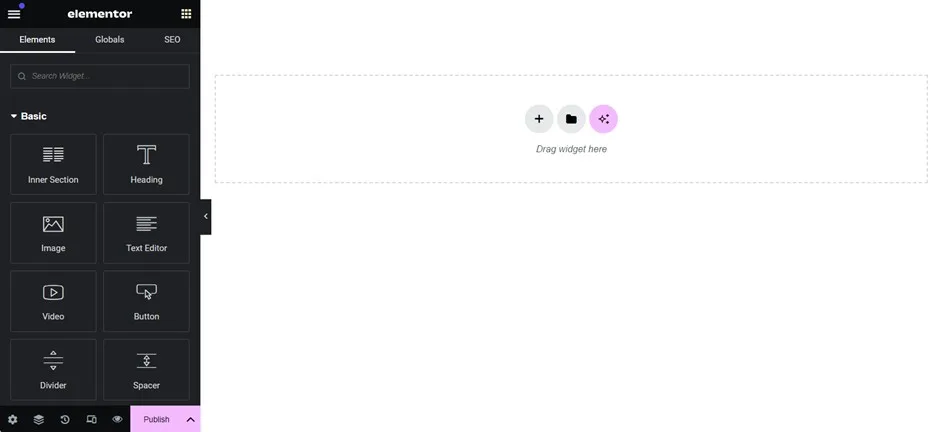
Once the installation is done, you may proceed to create your first webpage Pages -> Add New Page, in the WordPress page editor, give the page a title and click on the “Edit with Elementor” to access the page builder which you can drag and drop the widget to customize the page.
In order to create a landing page, we can use the canvas giving you a blank page to start with. Go to the page setting with a gear icon at the left bottom corner and change the Page Layout setting to “Elementor Canvas”.
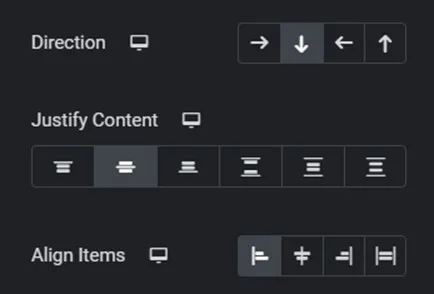
At this point, there are one important matter you should get familiar on how to structure your website with the latest Elementor Flexbox and Grid layout system.

Flexbox Layout
Flexbox is a CSS layout module designed for more control over alignment, direction, and spacing of items within a container, making it ideal for complex and dynamic layouts in creating responsive and adaptive layouts.
Grid Layout
The grid layout is a system divides the page into rows and columns, allowing you to place elements precisely within the grid also the system is built to be responsive with the use of column span to adapt different screen sizes and devices.
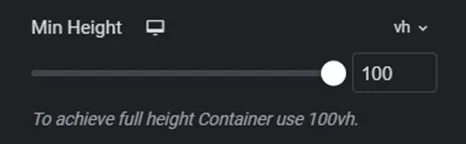
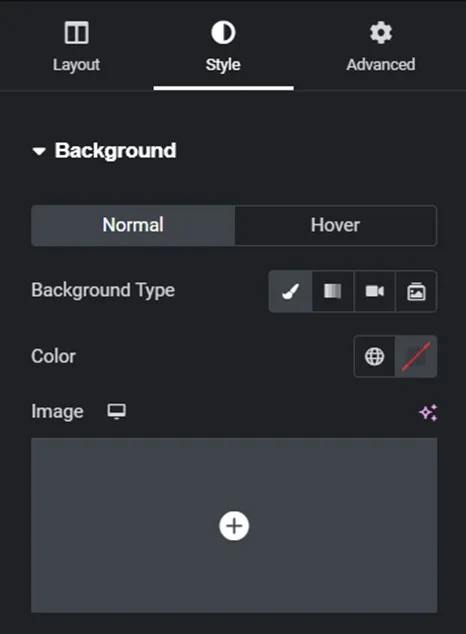
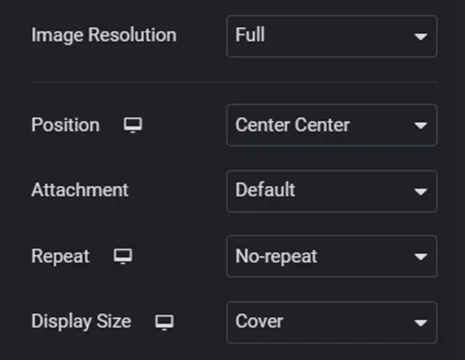
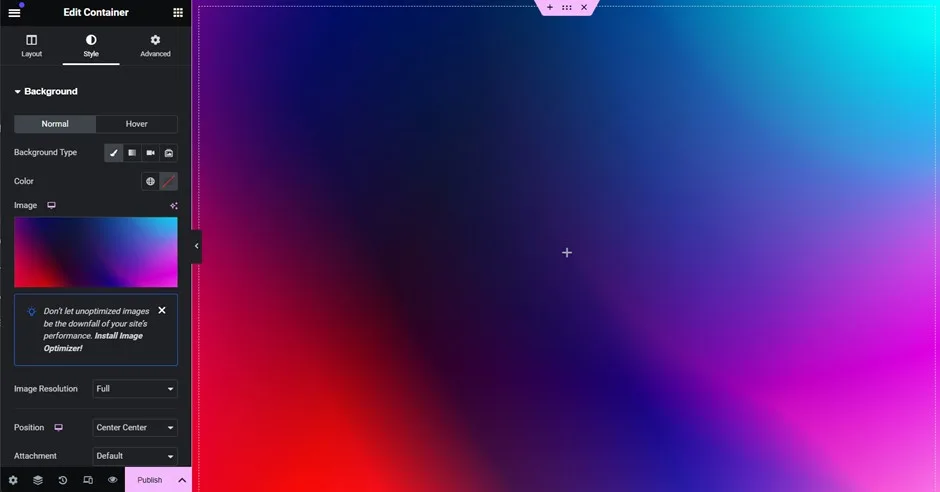
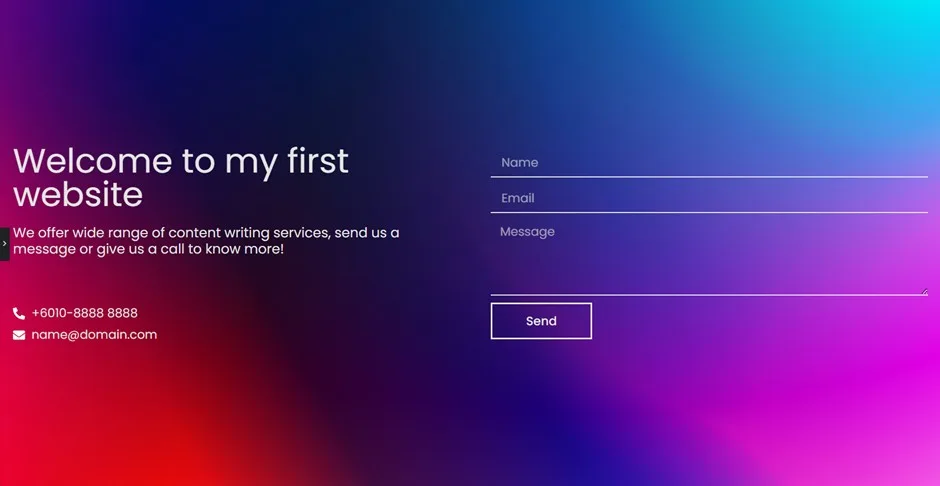
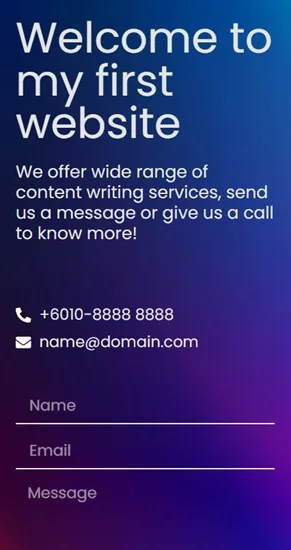
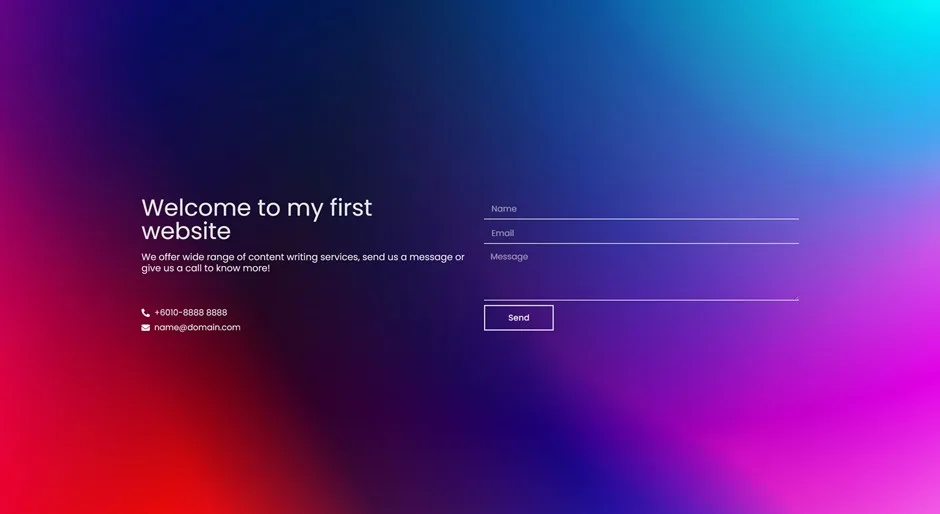
We will create a welcome page with a contact form, so let’s get started with choosing the Flexbox system set the minimum height to 100vh to make the section showing the content in full height on all devices, and go to “Style” tab add background image and configure the background image setting to ensure the background displayed correctly in any screen size.
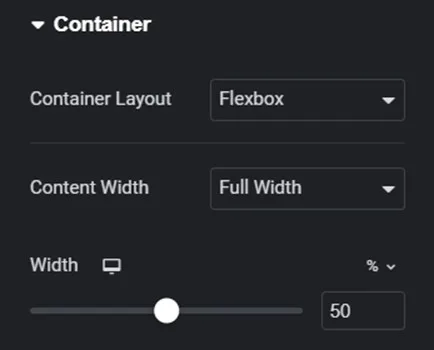
Now you have one big section, to make a divided section you may drag the “Container” widget and place in the editor. In order to make both container having the equal width, make sure to set “Content Width” to “Full Width” and “Width” of both container to 50%.

Now you almost there as title, subtitle, contact information and the contact form is added. However, it does not look great as all the widget is vertically top aligned. In order to make it center align, click “Edit Container” at the top left corner and adjust with the “Justify Content” option to make all the widget align in the center.
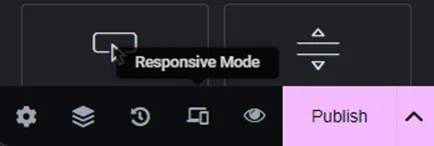
Once you turned on the responsive mode, a responsive setting toolbar will be appeared on top of the editor that enable you to switch between desktop, tablet, mobile or set the dimension according to your need.

As if you change the default setting of the widget, you might be facing issue on smaller devices therefore you need to check if your site is responsive to different screen size.

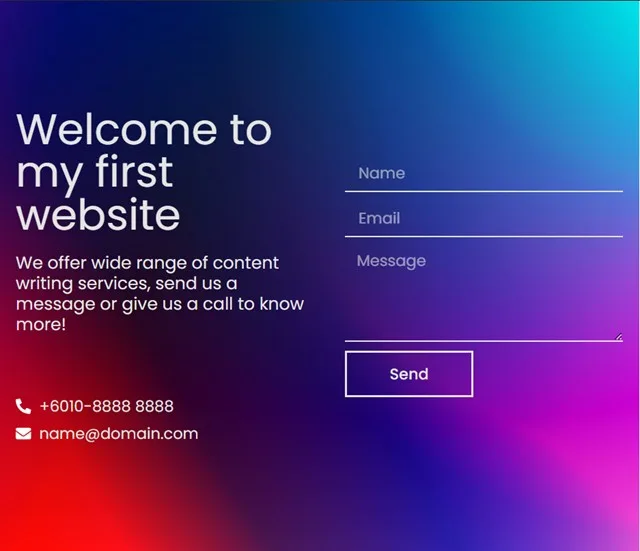
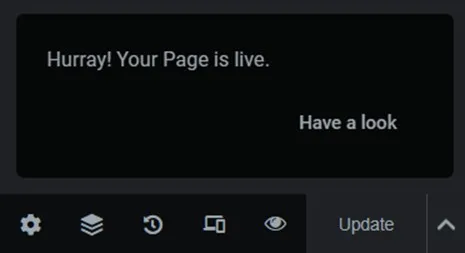
Once you have the setting configured and checked on the responsiveness, you may check have a glace on your work in actual browser before publishing to everyone with the “preview changes”. If everything is good, your first website is ready to publish by clicking the “Publish” button at bottom left corner.

If you’re still reading this article, Congratulation! You made this far to publish your first website from setting up server to design and create your first page all by yourself! Hope you learn something and enjoy the reading!
Hand-picked related articles
Ways to Improve Your Site’s Ranking (SEO)
Use these actionable tips to take your SEO to the next level and send your website ranking up to the top of the search engine rankings. Gain more visibility, drive organic traffic, and set your…
Benefits Of SEO
Whether it's a new business or growing one, just think of your business popping up on the first page when…
Who Should Use Shared Hosting
If you fall into any of the categories below, shared server hosting might be suitable for you: 1. Small Businesses…
ServerFreak is ISO 27001:2022 certified
Here are 5 great reasons to cheer Firstly, let us tell you about the cert. ISO 27001:2022 is the world’s…